Submitting a pull-request
The website is hosted on a github repository. To submit a change you’ll have to make a so-called “pull-request”. This page is a step-by-step explanation on how to do that.
Step 1: create a github account
Create an account here. You can choose to remain anonymous, but I personally recommend to use github under your real name.
Step 2: create a fork
If you haven’t done it yet, create a fork of the website’s repository by clicking on the fork button:

The newly created fork should now be available under your own personal profile,
under the address: https://github.com/USERNAME/transparency-lecture.github.io
where USERNAME is your github account name.
Step 3: make sure that your fork is up-to-date
If you just forked the repository for the first time, you can skip this step.
If not, you should check that your master branch is up-to-date:
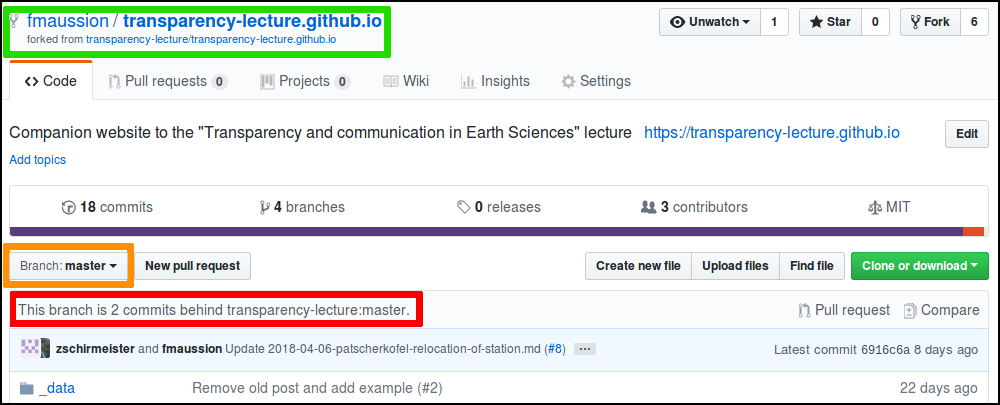
- go to your forked repository website (see above): you can check that you you are on the right page by checking the header (green box in the image below).
- make sure that you are looking at the master branch (orange box in the image below).
- check the current status. If the message says that you are behind (red box in the image below), continue reading. If it says that you are up-to-date, go to step #4.
If you are behind, a tiny bit of command line manipulation is necessary:
- install git
on your computer. On linux, this is as simple as
$ sudo apt-get install git. - update your git name and email:
git config --global user.name "Mona Lisa"andgit config --global user.email "email@example.com". The name is not very important, but the email must match the one you provided to github. - in any directory, type:
$ git clone https://github.com/fmaussion/transparency-lecture.github.io.gitThis will create a new directory calledtransparency-lecture.github.io. Navigate to this repository ($ cd transparency-lecture.github.io) - add the main repository as upstream (in order to get the updates from it):
$ git remote add upstream https://github.com/transparency-lecture/transparency-lecture.github.io.git - get the updates from github:
$ git fetch upstream - merge them in your master branch :
$ git checkout masterand$ git merge upstream/master - upload them to your online fork:
$ git push origin master. You might have to enter your github credentials at this step.
You’re all set! If everything went fine, your online master branch should indicate that you are up-to-date with the original repository.
Step 4: create a new branch
On your fork’s website (see above), click on the “branch” button and type a new branch name (see example below). The tool should suggest you to create a new branch:

From now on you should always select this new branch before making further changes.
Step 5: adding / editing files
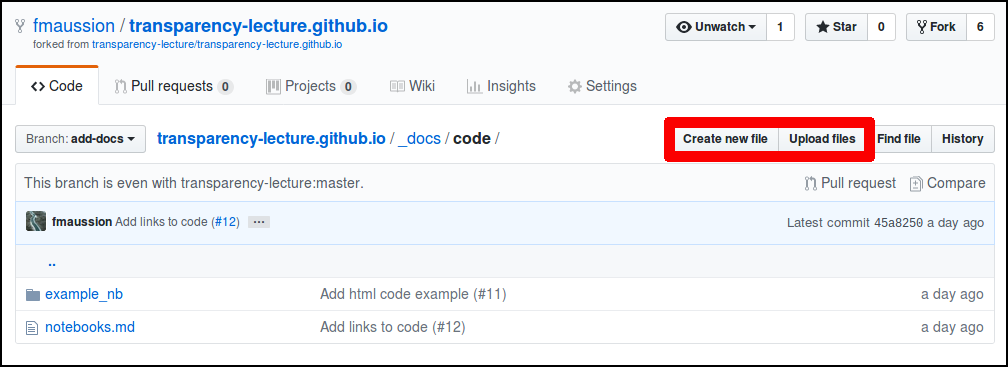
In this new branch, you can navigate to the folder or the file you like to edit. The buttons to edit/add new files should be there for you:
After adding/editing your file(s), github should propose you to make a commit.
This is exactly what you should do! Make sure you select the
Commit directly to the BRANCH-NAME option.
Repeat step 5 as many times as necessary (you can do as many commits as necessary).
Step 6: submitting a pull-request (PR)
Now that you have added all your changes, github should suggest you to create a pull request. The homepage of your branch should look like:

Click on “Compare & pull-request”, add an informative message about what your changes are, and submit the PR!
Step 7: review process
During the review process, you might be asked to make further changes. If it is so, repeat step 5 as many times as necessary. Make sure that you are indeed working in the correct branch. After a new commit, the pull-request will be updated automatically.
What to do after my PR was accepted/merged?
You’re done! The branch you have used can safely be deleted/ignored. If you’d like to make new changes at a latter stage, restart at step 3 and create a new branch from master.